
Troubleshooting tips to follow when having trouble powering up the computer on a Redbird AATD.
Before you begin:
Make sure you're following the correct power up procedure. See Redbird AATD Power Up & Power Down Checklist for guidance.
Basic hand tools and knowledge of how to use them are required to follow these troubleshooting instructions.
Basic Troubleshooting
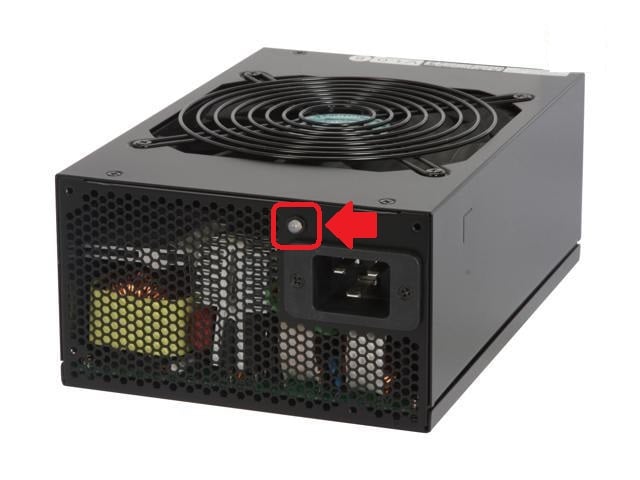
Status light on the power supply does not illuminate
Status light on the power supply is illuminated, but nothing happens when I press the power button
Advanced Troubleshooting
Reseat RAM, Graphics Card(s), PSU cables
Boot using minimum hardware required
Short the power switch pins on the motherboard
Basic Troubleshooting
Status light on the power supply does not illuminate
- Check the power strip or surge protector to make sure it is plugged in and turned on.
- Check for loose cables in the back of the computer (especially the main power cable).
- Check the outlet for power problems or try moving the power cable to a different outlet.
- Try a different power cable.
- Discharge the computer:
- Unplug all cables from the back of the computer (note the positions for all the cables) including power.
- Leave computer unplugged with no power to the unit for a minimum of 15 minutes to allow the computer to discharge.
- After discharging the computer, plug the power cable back in and check for a status light on the power supply. If the status light on the power supply still does not illuminate, the power supply may need to be replaced.
Status light on the power supply is illuminated, but nothing happens when I press the power button
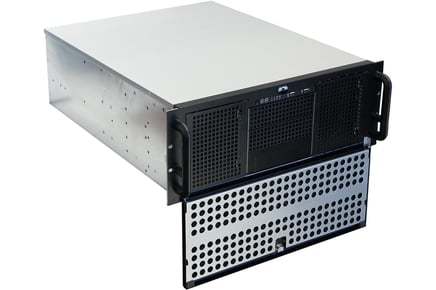
- Open the computer case:
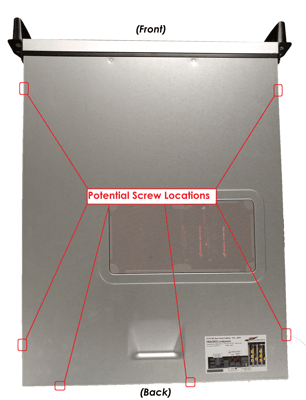
- Remove any bolts holding the computer chassis to the stand/frame beneath it. Not all computers are bolted to the frame; disregard if there are no bolts to remove for this step.
- Remove the screws securing the lid to the chassis; there will be between two and six screws securing the lid. You may need to slide the computer chassis forward or lift it up out of the stand/frame in order to see the screws.
- Once the screws have been removed, slide the lid backward (towards the cables), then lift up on the lid to remove.
- Some motherboards have on-board power and reset buttons. If your system has on-board power/reset buttons, press the power button to attempt to boot up the computer.
 Note: If your motherboard does not have on-board buttons, you can try to short the power button pins in the Advanced Troubleshooting section below.
 - Check for loose connections in the following locations:
- Power button/switch - check both ends of the power button/switch cable for loose connections.
- Power supply cables - check both ends of the cables that go between the power supply and the motherboard, processor, and video cards (if present) to make sure they are properly plugged in.
- Remove the CMOS battery to clear the BIOS, then attempt to boot up the computer.
- See: How to change the BIOS/CMOS battery for guidance.
Advanced Troubleshooting
Below are more advanced troubleshooting steps for those that are confident in their ability to work inside computers.
These instructions require familiarity with computer components, and some basic hand tools.
Reseat RAM, Graphics Card(s), PSU cables
Three components that can cause the computer to have issues powering up if they are not properly connected are the memory, graphics card(s), and power supply.
Memory
- Press down on the plastic lock tab(s) securing the RAM in place
- Lift each memory stick fully out of its slot
- Line up the notch in the memory stick with the tab in the slot, then push down firmly on both sides until the lock tab swings back up into place
Graphics Cards
- Unplug any PSU cables that are connected to the graphics card(s)
- Remove the screws securing the graphics card(s) to the side of the computer case
- Unlock the lock tab on the expansion slot securing the card in place
- Lift up to remove the graphics card(s)
- Line the card up with the slot, then press down firmly to plug it back in. The lock tab on the slot should swing back into place automatically.
- Secure the graphics cards to the computer case by screwing in the screws removed in step 2 above.
- Plug in any power cables removed in step 1 above.
Power Supply
Reseat both ends of the cables that go between the power supply and the various computer components. To unplug, press the locking-tab on the side then pull on the connector.
- Power supply to motherboard (20 or 24 pin)
- Power supply to processor (4, 8, or 2x8 pin)
- Power supply to graphics cards (4, 6, or 8 pin) - if present
- Power supply to PCI-E slots (6 or 8 pin) - if present
- Power supply to HDD/SSD/ODD drives (SATA) - if present
Some power supplies on Redbird AATD computers are fully modular with cables that can be unplugged/reseated on both ends for all components. If your power supply is not fully modular, disregard the PSU-end of the cables referenced.
Boot using minimum hardware required
To determine which component is causing the issue sometimes it's best to go down to the minimum, then add components back one at a time to see when the problem pops up.
- Unplug any USB cables plugged in to the computer.
- If your motherboard has on-board graphics capabilities, remove all graphics cards.
If not, remove all but one (usually closest slot to the processor) - Unplug any expansion cards (sound card, USB card, network card, etc.)
- Unplug any secondary (non-OS) storage drives & the optical/DVD drive (if present)
- Remove all but one memory stick (usually closest slot to the processor)
- Remove the CMOS battery to clear out the BIOS
Attempt to boot the computer after removing all non-critical hardware components, then proceed to one of the two below sections.
It boots!
Slowly add the components removed above back into the computer one at a time, booting up the computer between each component to make sure it's still booting. If after adding a component back into the computer it fails to boot, try removing that component then attempt to boot again to confirm that it's causing the problem.
Still not booting...
-
- Try a using different memory stick, or a different slot
- Try moving the graphics card to a different expansion slot
- Try removing the CMOS battery to clear the BIOS
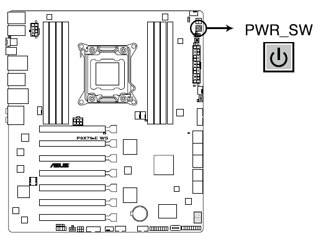
Short the power switch pins on the motherboard
- Trace the cable/wires coming from the power switch to the motherboard. They may either plug directly into the pins on the motherboard, or have a small white block on the end.
- Disconnect the wires (or the white block) from the motherboard, making note of the location of the power and ground connectors.
- Jump or short the two pins for the power and ground directly on the motherboard with a metallic instrument (screwdriver) momentarily.
If the last step works, the problem is a loose connection between the power switch and the motherboard. Unfortunately most of the time the built-in power buttons are quite difficult to replace, but you can source an adequate third party replacement by searching online retailers for a "Computer Front Panel Power Extension".
Contact Redbird Support for assistance, or if the above steps fail to resolve the issue.